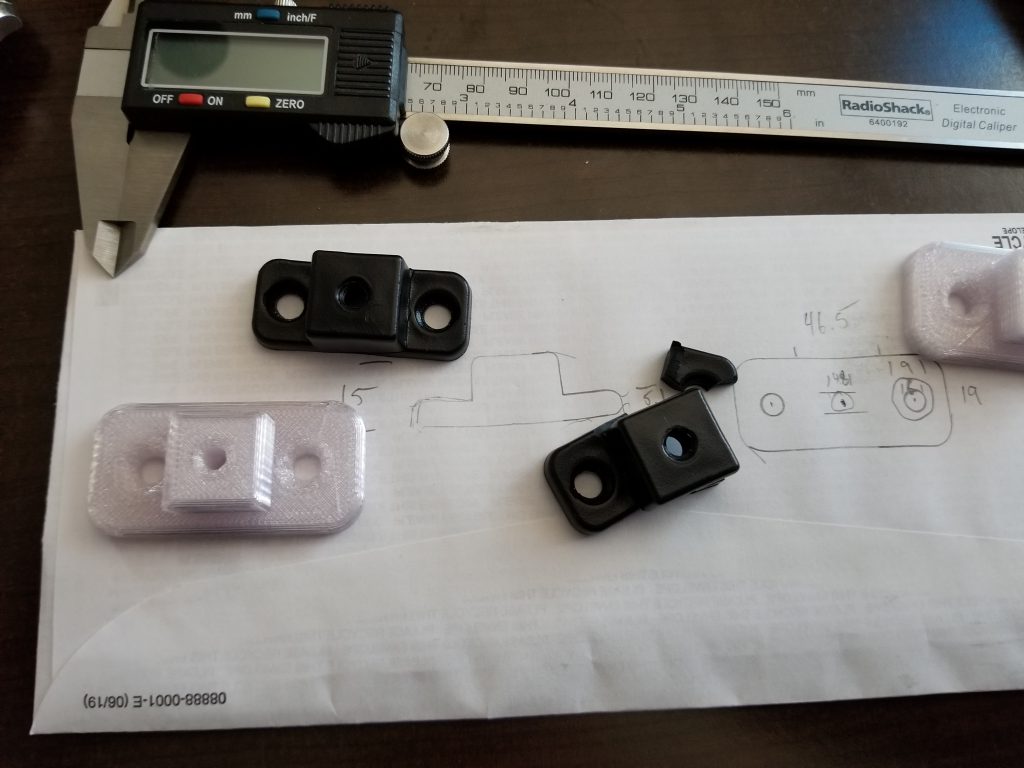
I though that I would share my standard work flow for fixing a simple household item.
Step 1: I tend to start by doing a rough sketch of the item I am drawing. This serves two purposes. First is give me the rough idea of what I am going to create. Most of the time when I am fixing an item it is as simple as tracing an item that I already have. The second purpose is to describe the dimensions of the object.

Step 2: CAD design. Using the drawings and dimensions I translate this to a 3-D model. This is actually a 2 step process for me as I usually take the 2-D drawing and create a sketch. I then extrude the sketch into the 3rd dimension to make the 3-D model.
I tried something new and captured a screen cast of my design process with Autodesk fusion 360 using Screen Cast Recorder. I did a one shot capture and did not edit it at all. As such there are a few extra clicks but over all I did pretty good. This was such a simple design that I did not think that I needed commentary. Maybe for the next one I will add some voice overs or text to describe my steps.
Step 3: Convert to STL and 3-D print. This is a simple process and I use Simplify3D to generate the SVG for my printer.
As you can see in the image above that it came out great the first time. I printed 2 at the same time an total print time was 45mins.
All together from removing the broken part to putting a new part in place was just over 1 hour.